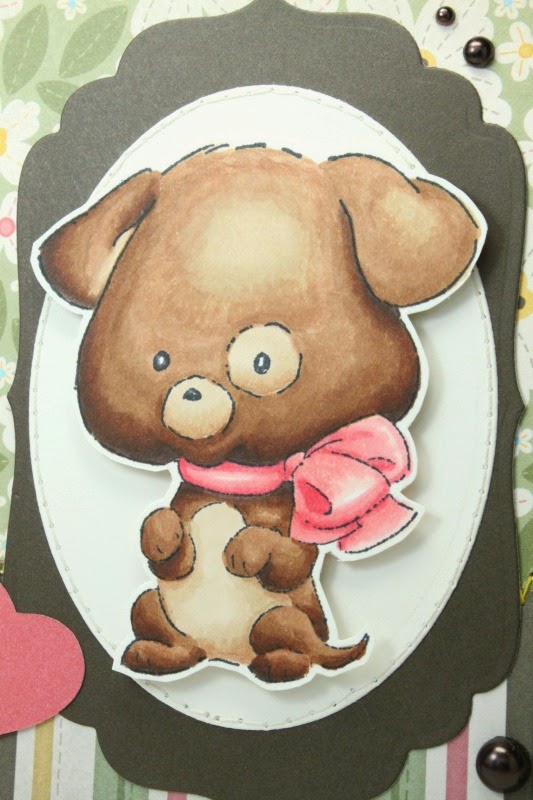
Patterned papers are Lollydoodle; Cardstock is Cotton Candy, Pear, Juniper, Slate & White Daisy; Ink is Slate - all CTMH; Coffee die, Verve; Stamp sets are Better Together and Coffee, Verve.
Saturday, February 28, 2015
Coffee Lovers Spring Blog Hop
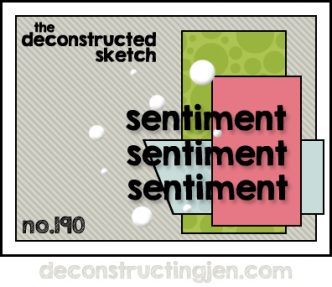
How fun - another Coffee Lovers Blog Hop is under way, this time with a spring theme! So I pulled out some bright & pretty papers and used the current Deconstructed Sketch to make my card:
Friday, February 27, 2015
The Challenge
I am in need of some birthday cards, so I'm using Lesley's great sketch & colour combo from The Challenge to add to my stash. The 'rust' in the colour combo has become more of a dusty orange for me, but I think it still works. I added some Wink of Stella to the butterfly to give it a little glimmer:
What a great sketch! I may have to use it a few more times :o)
Patterned papers are Real Time2, Echo Park; Stamp sets are Better Together and Happy Thoughts, Verve; Dies are Sprightly Sprigs and Vintage Oval Frame Die by Verve and Pippi Butterfly, Memory Box; Inks are Black and Honey, CTMH.
Thursday, February 26, 2015
New Art Impressions Try-folds!
The Art Impressions Design Team are debuting four new Try-fold stamp sets today. I have a wedding themed card with a matching gift bag and tag using Steeple TF Set (Sku #4578):
Here is a photo of the card folded, and tied with organdy ribbon:
When you untie the ribbon, both sides of the card fold out:
I tried something new this time, I usually back the side pieces with white cardstock to hide the fact that the Copic markers bleed through the paper... but I used the patterned green paper that I mounted the base on - and I love the look!
The stamp set comes with the three images and one sentiment "Blessings on this special day", and it includes all the instructions for you to stamp, fold and cut it accurately. I also love that each of the images can be used individually, so I used the bench image to make a gift tag that I tied onto a matching bag made with my Gift Bag Punch Board:
Head on over to the Art Impressions blog to see what the other DT members have to share - and you can link up your creation for our challenge debuting today, called "Tie It Up" we want to see your creations that are tied up with ribbon or twine.
Copics used: Greys are C7, C5, C3, C1, C00
Blues are B26, B24, B23, B21
Purples are V09, V06, V05, V04, V01
Pinks are R85, R83, R81
Greens are G46, G43, G40, YG03, YG01, YG67, YG63, YG61
Browns are E57, E55, E53, E51, E50
Tuesday, February 24, 2015
I Wuff You
It's my day to post on the Art Impressions blog!
I can't seem to stop using the sweet Zoo Babies stamps... today I'm sharing a card using Wuff Set (Sku #4532):
I love the sentiment that comes in the set "I Wuff You".
There is still time to join our Front & Back challenge - and we will have a brand new challenge on the blog on Thursday! Happy stamping!
Copics used: E49, E57, E55, E53, E51, E50, R35, R32, R30
Labels:
Ai Zoo Babies,
Art Impressions,
CTMH,
Mayberry,
Wuff Set
Tuesday, February 17, 2015
Birthday Front & Back
Are you loving the newly released Art Impressions Front & Backs?? I am! I have a sweet birthday card to share today using Eat Itself Set(Sku#4567):
Don't forget that there are FOUR brand new F & B sets available in the Ai store - as well as the classic F & B sets and the Mini Front & Backs. We would love to see you using them in our current "Front and Back Challenge" on the Ai blog. Happy Stamping!
Copics used - Skin tones - E11, E00, E000, R20
Hair - E55, E53, E51
Pinks - R85, R83, R81
Yellows - Y26, Y23, Y21, YR12, Y13, Y11
Blues - B02, B01, B00, B000
Greys - W7, W5, W3, W1
Greens - G43, G40
Oranges - YR16, YR15, YR12
Labels:
Art Impressions,
Eat Itself Set,
Front & Backs,
Jillibean Soup
Friday, February 13, 2015
Paper Smooches Picture Perfect Challenge
I'm feeling quite pleased with myself... I needed to make a valentine for my husband, and became determined to participate in the current Paper Smooches Sparks challenge which is based on an inspiration photo. The photo doesn't exactly have a masculine feel to it... but I at least managed to use all of the colours, turned it into a valentine and hopefully managed to keep it somewhat masculine. Here's what I came up with:
Here is our inspiration photo:
I've had these little shiny gold clothespins for a while, so they've supplied the gold accent, and I used a little Wink of Stella on my cow, but it doesn't show in the photo. I think my husband will like it!
Patterned papers are Head Over Heals, Bo Bunny; Stamp set is Chubby Chums, available at Paper Smooches; Cardstock is CTMH;
Labels:
Bo Bunny,
Chubby Chums,
Paper Smooches,
Paper Smooches Sparks,
Valentine
Thursday, February 12, 2015
Front & Back Challenge
Hello! We have a new challenge on the Art Impressions blog today which is a "Front & Back Challenge" - we want to see something on both the outside and inside of your cards. If you have some of the wonderful Ai Front & Back images, even better! AND - the design team is launching the first of the brand new 2015 Art Impressions images today - we have four brand new F & B sets for you. I am sharing Any Cake Set (Sku #4569):
Aren't they cute?? Their little grins really make me smile... here's what their back view looks like on the inside:
And here are the sweet kitties in Purrr-thday Set (Sku#4568):
In order to be as accurate as possible, I actually looked up both cat and raccoon images online so that I could make them look realistic. The fun part was making sure that I matched up the backsides of them when colouring. Here's the inside:
These cute sets come with both the front & back images, as well as one sentiment. And even though mine are cut out manually - Ai has DIES for them!! To make my openings, I cut out die cut shapes with my Cricut, and then used an old Coluzzle template to cut the openings for them to peer through:
Head on over to the Art Impressions blog to see what the rest of the Design Team are sharing today, and be sure to enter our challenge! I'll be back on Tuesday with another F&B card to show you.
Labels:
Art Impressions,
Copic Markers,
Front & Backs,
Pathfinding
Wednesday, February 11, 2015
A Glitzy Valentine
I have a sweet valentine to share with you today using one of the Art Impressions Mini Front & Backs stamps. This is for one of my daughter's friends... they both have a history with a small pig named Glitzy, so this was the perfect image to use to make her a card. I used my Wink of Stella pen on her to give her a bit of glimmer, and glitzed up the card in general with a few sequins.
I came up with the idea of having her holding a little heart - so I've decided to enter her into the current Art Impressions challenge "Have a Heart" (even though I can't win!). Here's the inside:
Labels:
Ai Mini Front & Backs,
Art Impressions,
Bo Bunny,
Valentine
Tuesday, February 10, 2015
Bananas card
I am posting on the Art Impressions blog today.
If you don't own any of the Ai Zoo Babies yet, you need to check them out! (And if you only own one or two, then you need to get them ALL!) These are the sweetest little critters, and make perfect baby cards, or a card for a toddler. Today I'm using Bananas Set (Sku#4531):
There is still time to participate in our "Have a Heart Challenge" over on the Ai blog - we want to see your creations with a heart on them. Happy Stamping!
Copics used - Monkey: E57, E55, E53, E51, E50
Bow: B95, B93, B91
Labels:
Ai Zoo Babies,
Art Impressions,
Baby Card,
Bananas Set,
Free Spirit
Friday, February 6, 2015
High Hopes Challenge #152
I am playing along with the High Hopes stamps challenge for the first time today! Their February theme is "Anything High Hopes Goes"... and so I pulled out one of their sweet bunnies to make a very spring-like card (wishful thinking, as we're supposed to get 30cm of snow this weekend!). You can find a huge selection of HH stamps in the One Crazy Stamper store... or you can visit the HH website. Here's what I came up with:
Stamp set is Curious Bunny S116 by High Hopes; Patterned papers are Cool Summer, Carta Bella; Pippi Butterfly die by Memory Box; Enamel dots, Your Next Embellie; Copic markers.
Stamp set is Curious Bunny S116 by High Hopes; Patterned papers are Cool Summer, Carta Bella; Pippi Butterfly die by Memory Box; Enamel dots, Your Next Embellie; Copic markers.
Labels:
Carta Bella,
Curious Bunny,
Easter card,
High Hopes,
One Crazy Stamper
Thursday, February 5, 2015
Verve Inspiration Challenge
I am so happy to have the Verve challenges back this month :o) I am using this week's Deconstructed Sketch paired up with the Verve February Inspiration Challenge which is "Vivacious Valentine"... so here is what I've made for my daughter:
There are some irredescent Sprinkles on the white&grey heart which don't really show up in the photo, but it gives it a little glimmer.
Patterned papers are Head Over Heals by BoBunny; Stamp sets are Wings of Love, Notebook Paper and So Sweet Plain Jane, all Verve; Wavy Hearts dies & Notebook die by Verve; Cardstock is White Daisy, Grey Wool & Cotton Candy, CTMH; Inks are Black, Grey Flannel & Cotton Candy; CTMH;
Labels:
Bo Bunny,
Deconstructed Sketch,
Diva Dare,
Valentine,
Verve,
Wings of Love
Tuesday, February 3, 2015
Sports Fan Shaker
It's my Tuesday to post on the Art Impressions blog! (And this is my second post of the day - please scroll down to see my Fairy Godmother spinner card!)
I have two more masculine cards to share today, using one of the Ai Shaker images: Sports Fan Shaker (Sku #4527)
Now, this first one turned out looking a little like a Seattle Seahawk fan.... wasn't intentional, more like an afterthought :o) So then I thought, the least that I could do was to represent one of my hometown teams - so here is my Toronto Raptor fan:
Oh, the possibilities with this set! It includes the full body image, plus a second stamp of just the foam finger, so I cut those out and popped them up on an Action Wobble, so they wave it at you. A great card for those sports fans in your life.
Copics used: Skin tones - E13, E11, E00, E000, E37, E34, E31, R20
Blues - B97, B95, B93, B91
Greys - W9, W7, W5, W3, W1, W00
Greens - YG03, YG63
Reds - R59, R27, R24, R22, R20
Fairy Godmother Spinner card
I am posting on the One Crazy Stamper blog today. I have a very fun card to share - using one of the new Art Impressions Spinners from their 2015 release. This little fairy is my absolute favourite out of all the new Ai product! I've made a spinning easel card to show her off, here is Fairy (Sku #4576):
The Spinners are literally designed to spin! The set comes with both a front and back image, and a sentiment. I have sandwiched a piece of thread between the front and back when I glued her together, and then I've suspended the string between my die cut frame. Here's a close up where you can see the thread:
After colouring the fairy, I used pieces of washi tape to secure two Spellbinder's dies together, and then cut them out twice in the turquiose cardstock to form my frame:
After fussy cutting the fairy, I drew a light pencil line on the wrong side of her, and ran a line of glue down it to adhere the piece of thread. Then I glued the fairy together, and sandwiched the top and bottom ends of the thread between the frame pieces.
My card base is 5 1/2" x 11". You can see below that I glued two matted pieces of star print paper onto the card front. I scored a line across the front between the two panels - this is where the card will fold up to the easel shape. I positioned the smaller of the two dies (the photo shows both, but I removed the larger die before cutting!) in the middle of the front and ran it through my Cuttlebug. Then I glued the bottom half (only!!) of the turquiose frame on top of the opening, so that when the front is bent upwards, the fairy would be suspended in the frame.
Here is what the card looks like closed:
And finally a few more shots so that you get the idea - you won't believe how difficult this card is to photograph, as she literally spins all the time. I set her spinning, then quickly shoot a bunch of photos until I get her facing forward - it's quite funny :o)
One Crazy Stamper products: Art Impressions Fairy Set (Sku #4576)
Subscribe to:
Posts (Atom)


