Tuesday, January 31, 2017

Masculine birthday cards

 I have found myself in need of a handful of masculine cards recently!  I pulled out one of the Ai clear stamp sets called Birthday Wishes (Sku #AICS36) who has this cute fella as one of the images, and made three similar cards:
 The houndstooth print was perfect for paper piecing, so I tried it out for both his top and shorts:
 I popped up a couple of the images & sentiments with pop dots, and left one flat for easier mailing.
 I added some blue epoxy bubbles and some zigzag stitching with my sewing machine, and that was it!

 Copics used: E13, E11, E00, E000, R30, W3, W1, W00, B26, B24, B23, B21, Y26, Y21, E50, R22, YG95, YG93, YG91.  Happy stamping!


Tuesday, January 24, 2017

Windows to the World Valentines

 There is plenty of time to check out Art Impressions' selection of Valentine stamp sets, and order them in time to have your cards ready for Feb 14th!  I am using two of the Windows To The World stamps today, both of which are Valentine themed.  Here is Valentine Mail (Sku # M3229):
 And now for a similar card using Life Is a Breeze (Sku #M3228):
 I used a very delicate gold thread by Gutermann to hand stitch some detail on the edge of the frame for a little shimmer:
Check out all of the Windows To The World stamps - there are images for every occassion!


Sunday, January 22, 2017

First 2017 Christmas Cards

Hurray!  I finally have some cards that I can count over there on the right side of my blog... I managed to get six fairly simple Christmas cards made this weekend.  I ordered this gorgeous City Sidewalks paper by Close To My Heart from my niece (it is even prettier than the photos), and wanted to show off the busier prints in the pack.  I stuck with some simple Verve sentiments, a few colourful & sparkly snowflakes and some wonderful tree diecuts from the newest CTMH Cricut cartridge, Flower Market:

I am really loving the images on the Flower Market cartridge, so you'll be seeing a lot of those in the future.

Saturday, January 21, 2017

Inspired By All The Little Things #40

I am the hostess over on the Inspired By All The Little Things challenge blog today, with my talented friend Donna Rudy as my guest designer.  Here is the inspiration photo that Donna picked to work with this week:
I was lucky enough to receive the newest Close To My Heart Cricut cartridge 'Flower Market' as a gift from my niece & sister this fall, and knew that there was a chrysanthemum diecut image on it.  I wasn't sure exactly how I'd use it, but ended up pulling out some distress inks, and used the negative from the die cut as a stencil.  I sponged a soft background, and added the pale pink diecut flower on top.  A little machine stitching and a sentiment from Verve finished it off:

Check out what Donna and the design team have to share with us this week over on the Inspired By blog, and be sure to link up your own creation!

Thursday, January 19, 2017

Spring Colours Challenge & new Art Impressions!

It's my day to do a feature on the Art Impressions blog, and Ai is launching their new 2017 Easter & Valentines sets:
I am so excited to share the brand new Easter Blessings set (Sku #4886) with you today!  I've been itching to do a pop-up card for a while now, and this seemed to be the perfect stamp set!  

 I used this double sided patterned paper from Doodlebug Designs as my card base - the colours inspired me, and it helped to keep my layers to a minimum, and not make the card too bulky.  Here's the inside:

 I started by cutting an oval shape from some teal cardstock.  I scored it in half, then cut the tall skinny flap to glue the bunny to, and the two narrow flaps which will hold up the fence:
The clouds were really fading into the background, so I added some lime circles behind them which ended up really pulling the colour combo together!

 Here you can see the depth of the pop-ups a bit better:
 Celebrate Spring comes with four main images, and the two sentiments I've used on my card - perfect to use for Easter or just a spring greeting card.  There are two new stamp sets releasing today on the Art Impressions website, check them out!
The new challenge on the Ai blog is Spring Fling!  We want to see your creations with Spring colours:

Happy stamping!!


Tuesday, January 17, 2017

Fabric Boxes

 I'm back with the January edition of Tuesday Threads with Karen on the Art Impressions blog... and this is the most fun that I've had sewing in a while!  I came across this idea on Pinterest, and knew that these little fabric boxes would be amazing in the Art Impressions Shop Hop fabrics that are available through Henry Glass Co.

I intended to make just one... and ended up with four!  Trust me, if time wasn't an issue, you'd be seeing about a dozen of these.  I started with the largest, and just kept making them smaller!

I'm not going to give you a full tutorial, just a bit of info - if you're interested in making some of your own, just do an internet search for "fabric boxes" and there are some very helpful, easy-to-follow tutorials out there.  But I've got lots of photos to share (they were just so cute... I kept snapping pictures!)
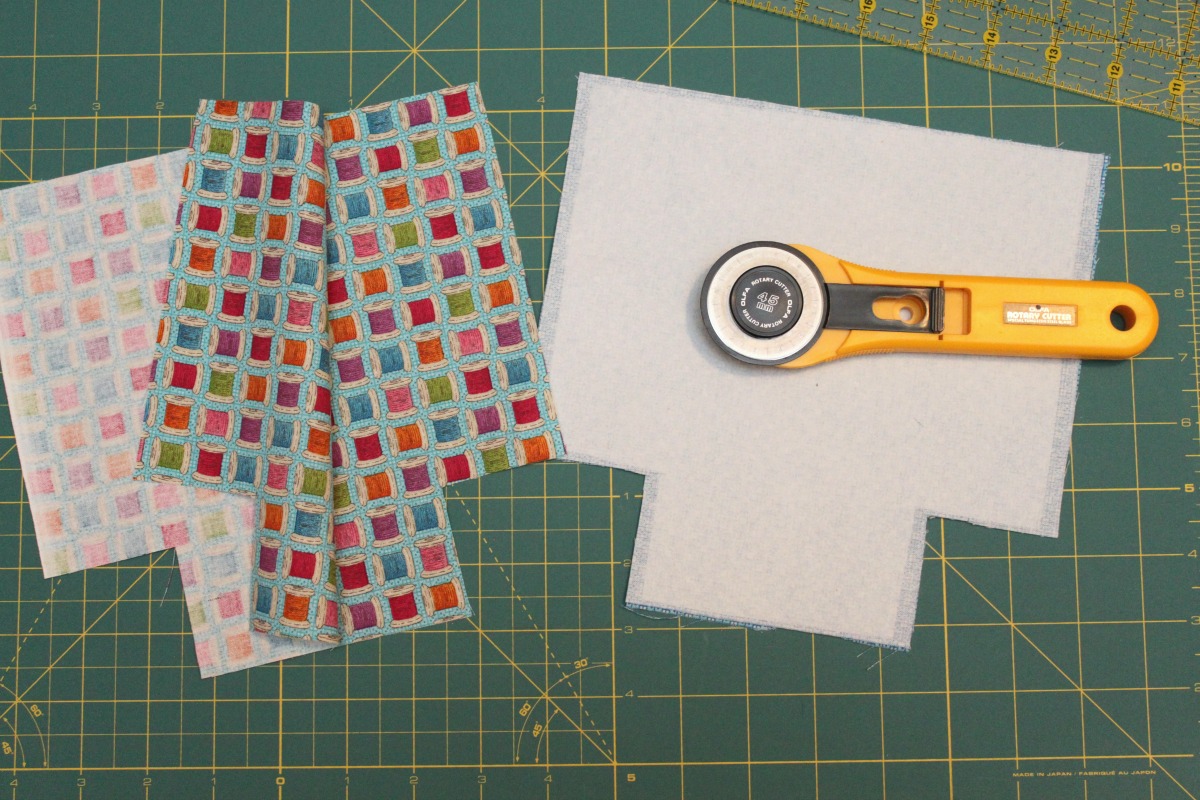
The largest box was made by cutting two 12" squares of fabric, and two of contrasting fabric for the lining.  I cut out 3"x 3" squares from the two bottom corners, and then ironed on Therm O Web's medium weight fusible tricot interfacing onto both lining pieces.  I sewed down the sides and across the bottom, then mitred the corners to form the box shape - on both the outer and lining pieces.  With right sides together, I sewed the top rim of the box to the lining, leaving a 2" opening to turn them inside out, which I then hand sewed shut.  Here's what it looks like:

 I rolled down the top edge to form a bit of a cuff, and to show off the contrast lining.
 Oh, the possibilites of what you could use these for in your sewing room!  Or your craft room... or the kitchen... or as gift packing...


 The largest started with 12" squares of fabric, and the others are 10", 8" and 6" squares of fabric respectively, with the corners getting smaller for each size.  Adding the Therm O Web interfacing to the lining worked really well, giving just the right amount of stiffness and support to the boxes.

I'll see you next month with another fun Ai fabric project.
Happy sewing!


LinkWithin

Related Posts with Thumbnails